
VMOS Cast Product Manual
This manual explains every user-facing feature in VMOS Cast v1.0.0 based on the real desktop client. Screenshots were captured from the official macOS package; device screens, device serials, and LAN addresses are redacted.
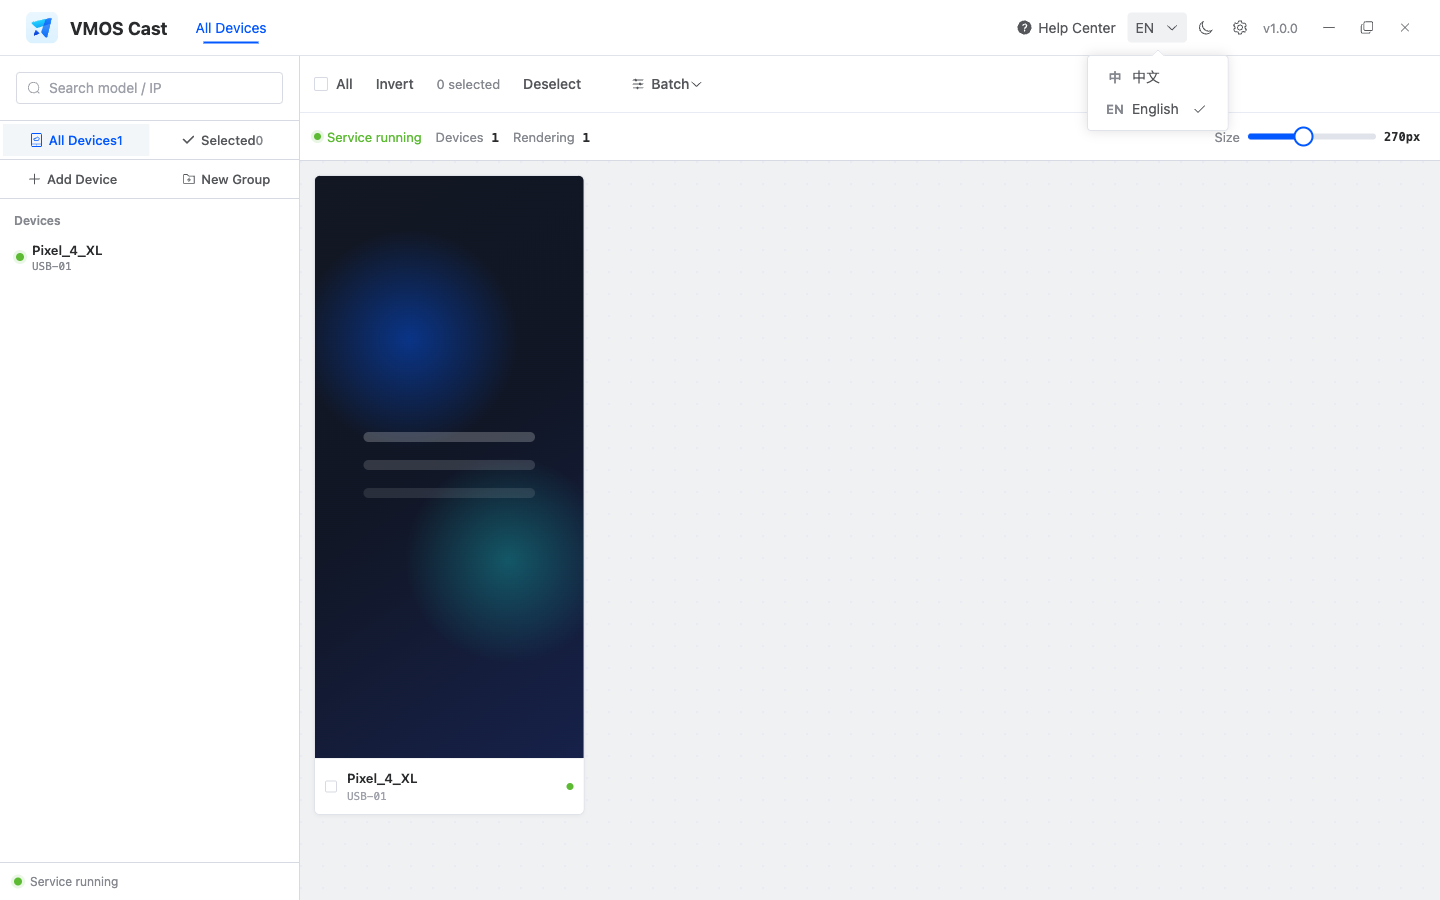
Interface Overview
The main screen has four areas:
| Area | What it does |
|---|---|
| Top bar | Help Center, language switch, light/dark theme, Settings, version, and window controls |
| Sidebar | Search devices, switch All/Selected/Groups, add devices, create groups, and check service status |
| Toolbar | Select all, invert selection, deselect, expand batch operations, view device/rendering counts, and resize cards |
| Device wall | Shows every device screen and status; click the screen to open the control window, click the card area to select |
The bottom-left dot shows the casting service status. Green means the service is running. If it stops, VMOS Cast tries to recover automatically, and the empty state also provides a Retry button.
Add Devices
VMOS Cast supports three ways to add devices:
| Method | Best for | How |
|---|---|---|
| USB cable | Physical Android phones connecting for the first time | Enable USB debugging, connect by data cable, and allow debugging on the phone |
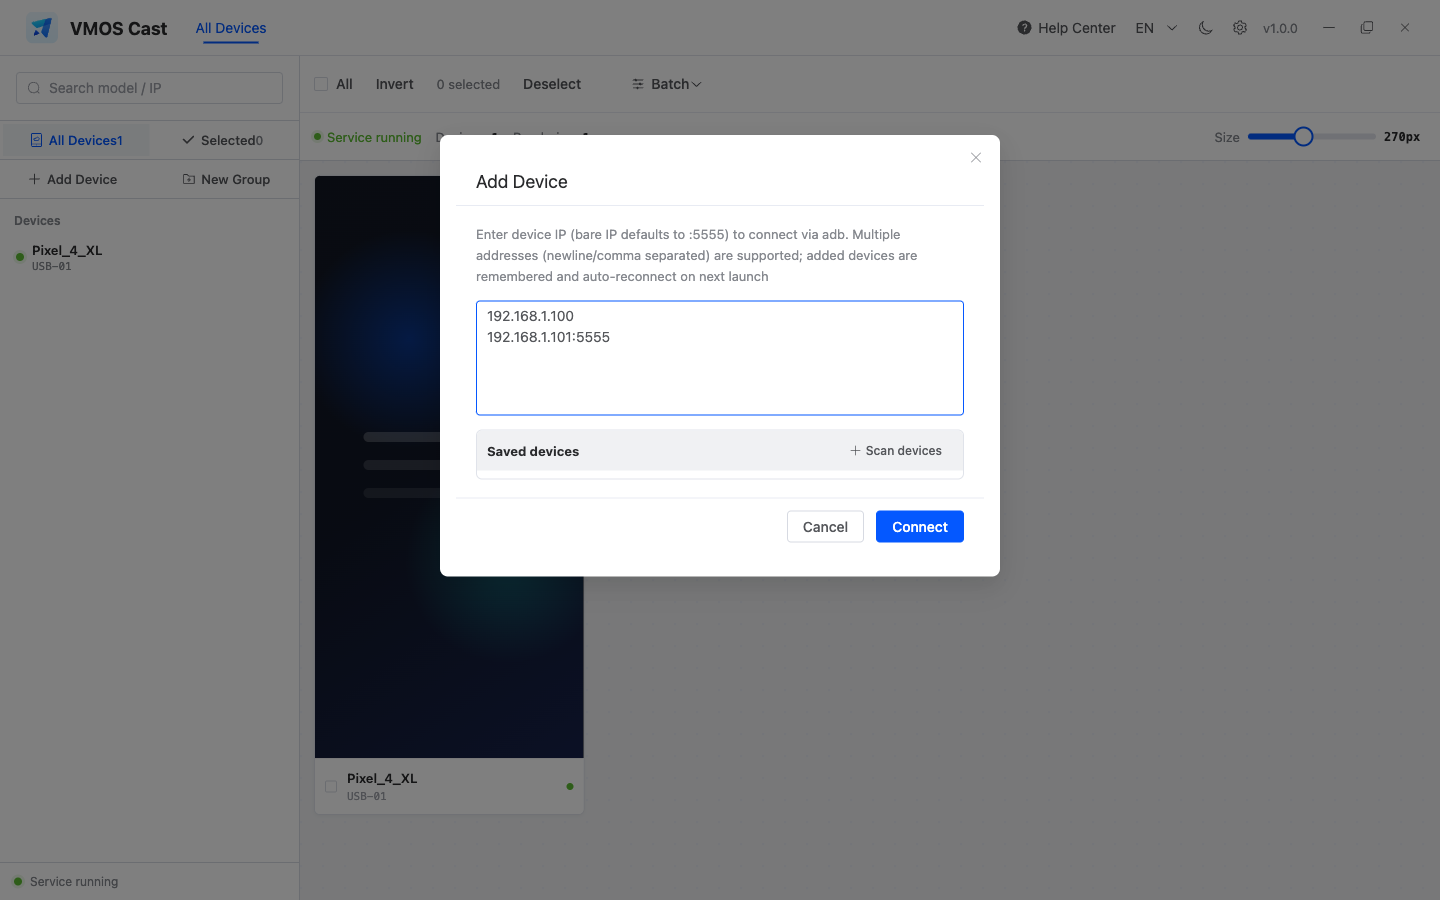
| Manual address | Cloud phones or physical phones with network debugging enabled | Click Add Device and enter IP:5555; if you enter only an IP, VMOS Cast uses port 5555 |
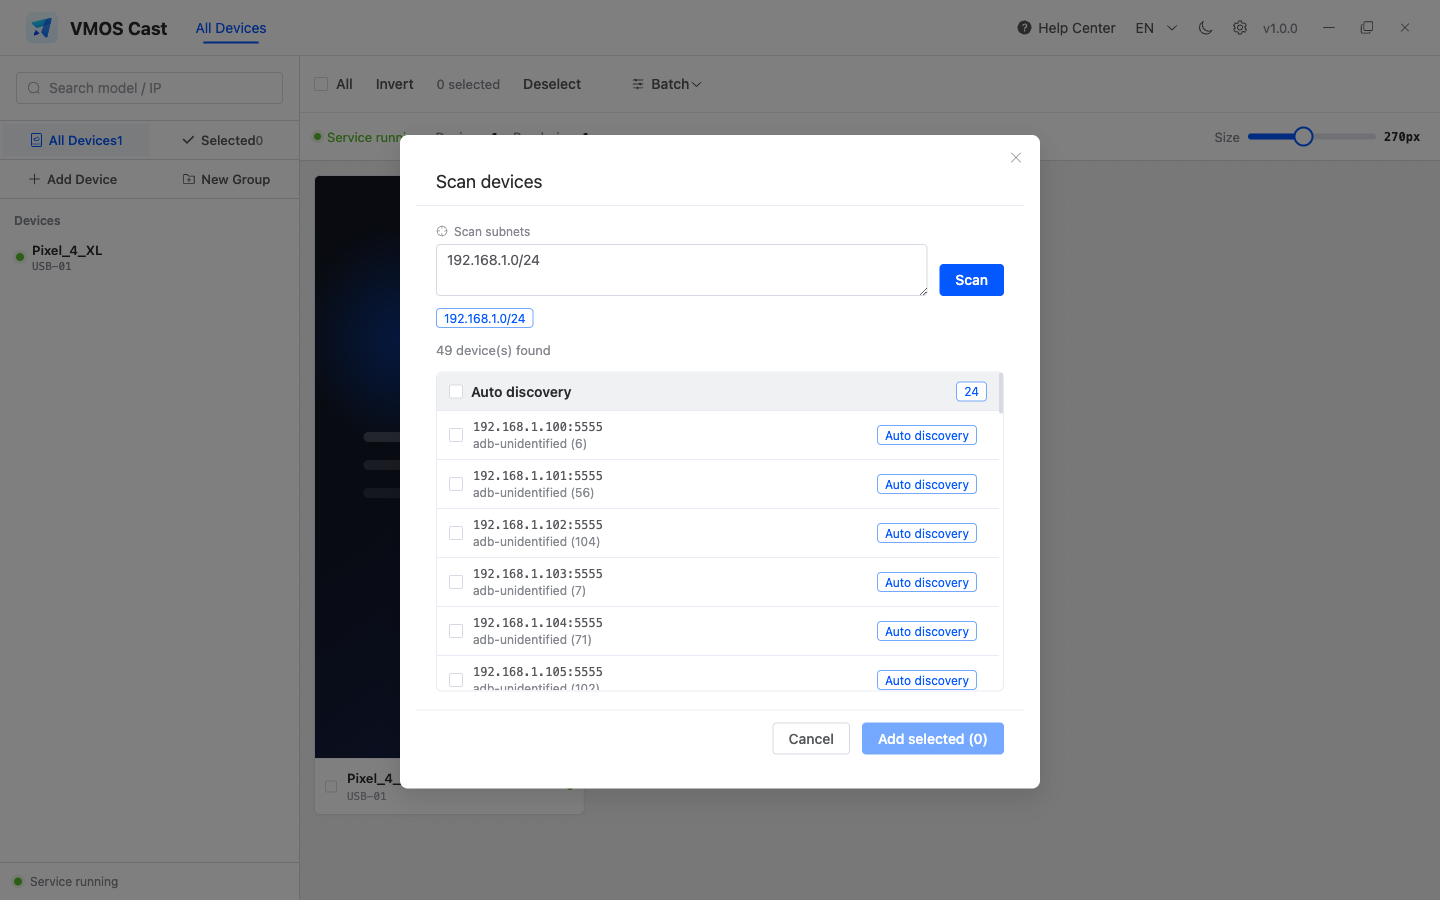
| Scan devices | Devices on the same LAN with network debugging enabled | Open Add Device, click Scan devices, scan a subnet, then select devices to add |
The Add Device dialog accepts multiple devices at once. Separate addresses with new lines, spaces, or commas. Added devices are saved and automatically reconnected the next time you start VMOS Cast.
When scanning, enter one or more subnets. Results are grouped by source; select devices and click Add selected.
TIP
After a physical phone reboots, network debugging usually turns off. Connect it by USB once again before using WiFi connection. Cloud phones are usually kept open by the cloud-phone platform.
Device Wall
| Action | Description |
|---|---|
| Open control window | Click the screen area inside a device card |
| Select device | Click the bottom or edge of the card; selected cards get a blue border |
| Select all / invert | Applies only to currently visible devices, which works well with groups |
| Search devices | Filter by model or address from the sidebar search box |
| Resize cards | Use the Size slider on the right of the toolbar |
| Remove devices | Use Remove selected in the batch panel; offline cards can also be removed individually |
The wall shows total devices and currently rendering devices. When you resize cards, VMOS Cast adapts the stream to the new display size, so large cards stay clear and small cards use fewer resources.
Groups
Use groups to organize devices by task, project, or area:
- Select devices on the wall;
- Click New Group in the sidebar and enter a name;
- Click a group in the sidebar to show only that group's devices;
- Use Move to Group in the batch panel to move selected devices into another group;
- Deleting a group only removes that view. It does not uninstall, disconnect, or delete devices.
Groups and search only filter the view. They do not interrupt active streams.
Batch Operations
Select devices, then click Batch in the toolbar.
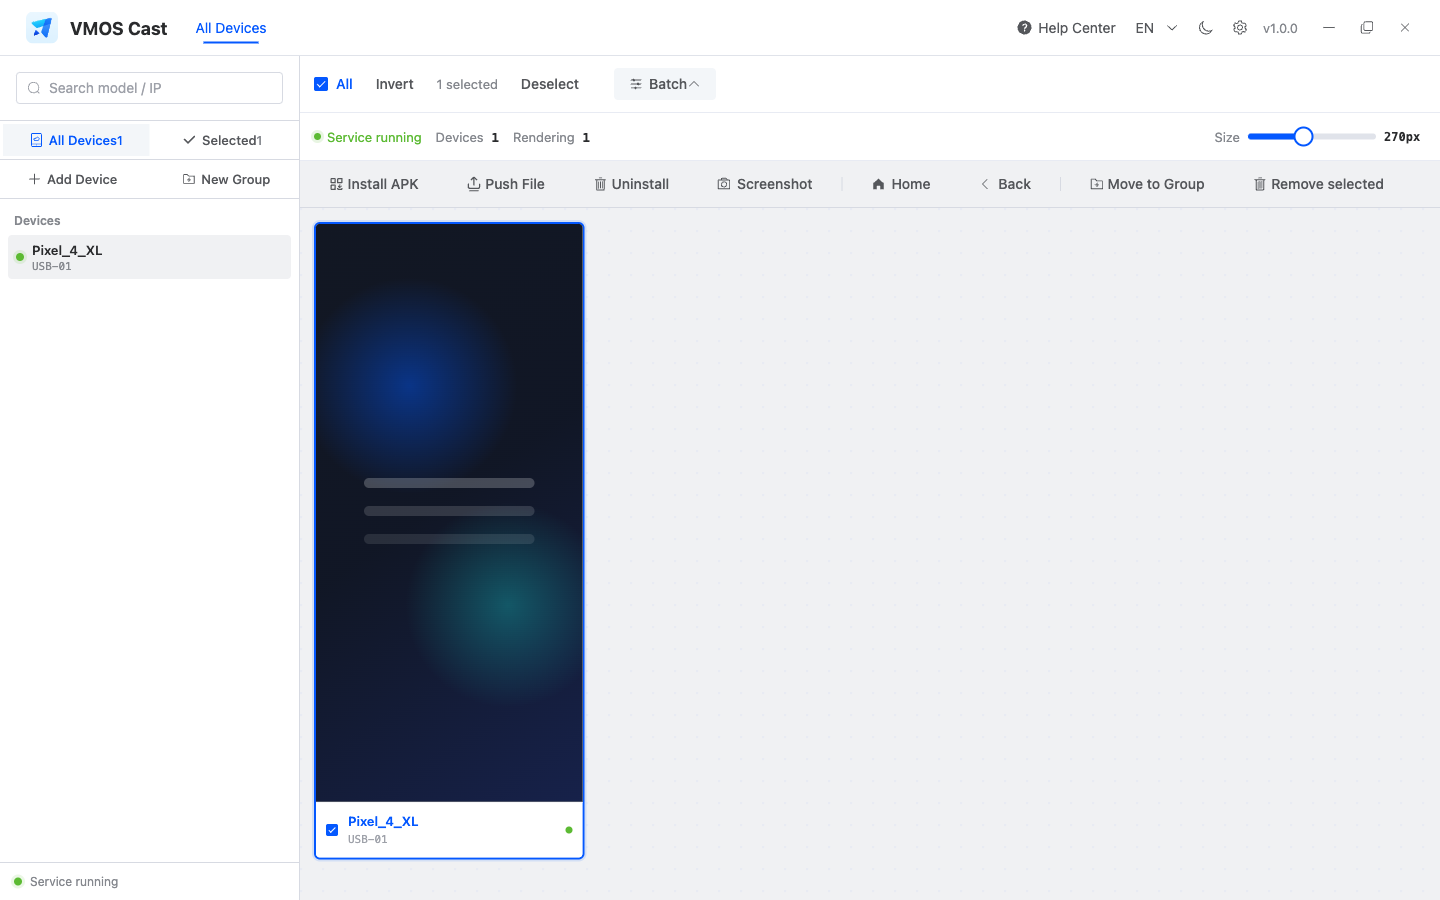
| Feature | What it does |
|---|---|
| Install APK | Choose an APK on your computer and install it to all selected devices |
| Push File | Send a local file to all selected devices |
| Uninstall | Enter a package name and uninstall it from all selected devices |
| Screenshot | Capture screenshots from all selected devices and save them to the computer |
| Home / Back | Send Android system keys to selected online devices |
| Move to Group | Move selected devices to an existing or new group |
| Remove selected | Remove selected devices from the wall and delete saved addresses |
Batch operations report per-device results. If one device fails, the others continue.
Batch uninstall cannot be undone. Confirm the package name first, and test on one or two devices before running it on a full group.
Single-Device Control Window
Click a device screen to open a standalone control window. It does not cover the device wall, so it is useful for precise work on one device.
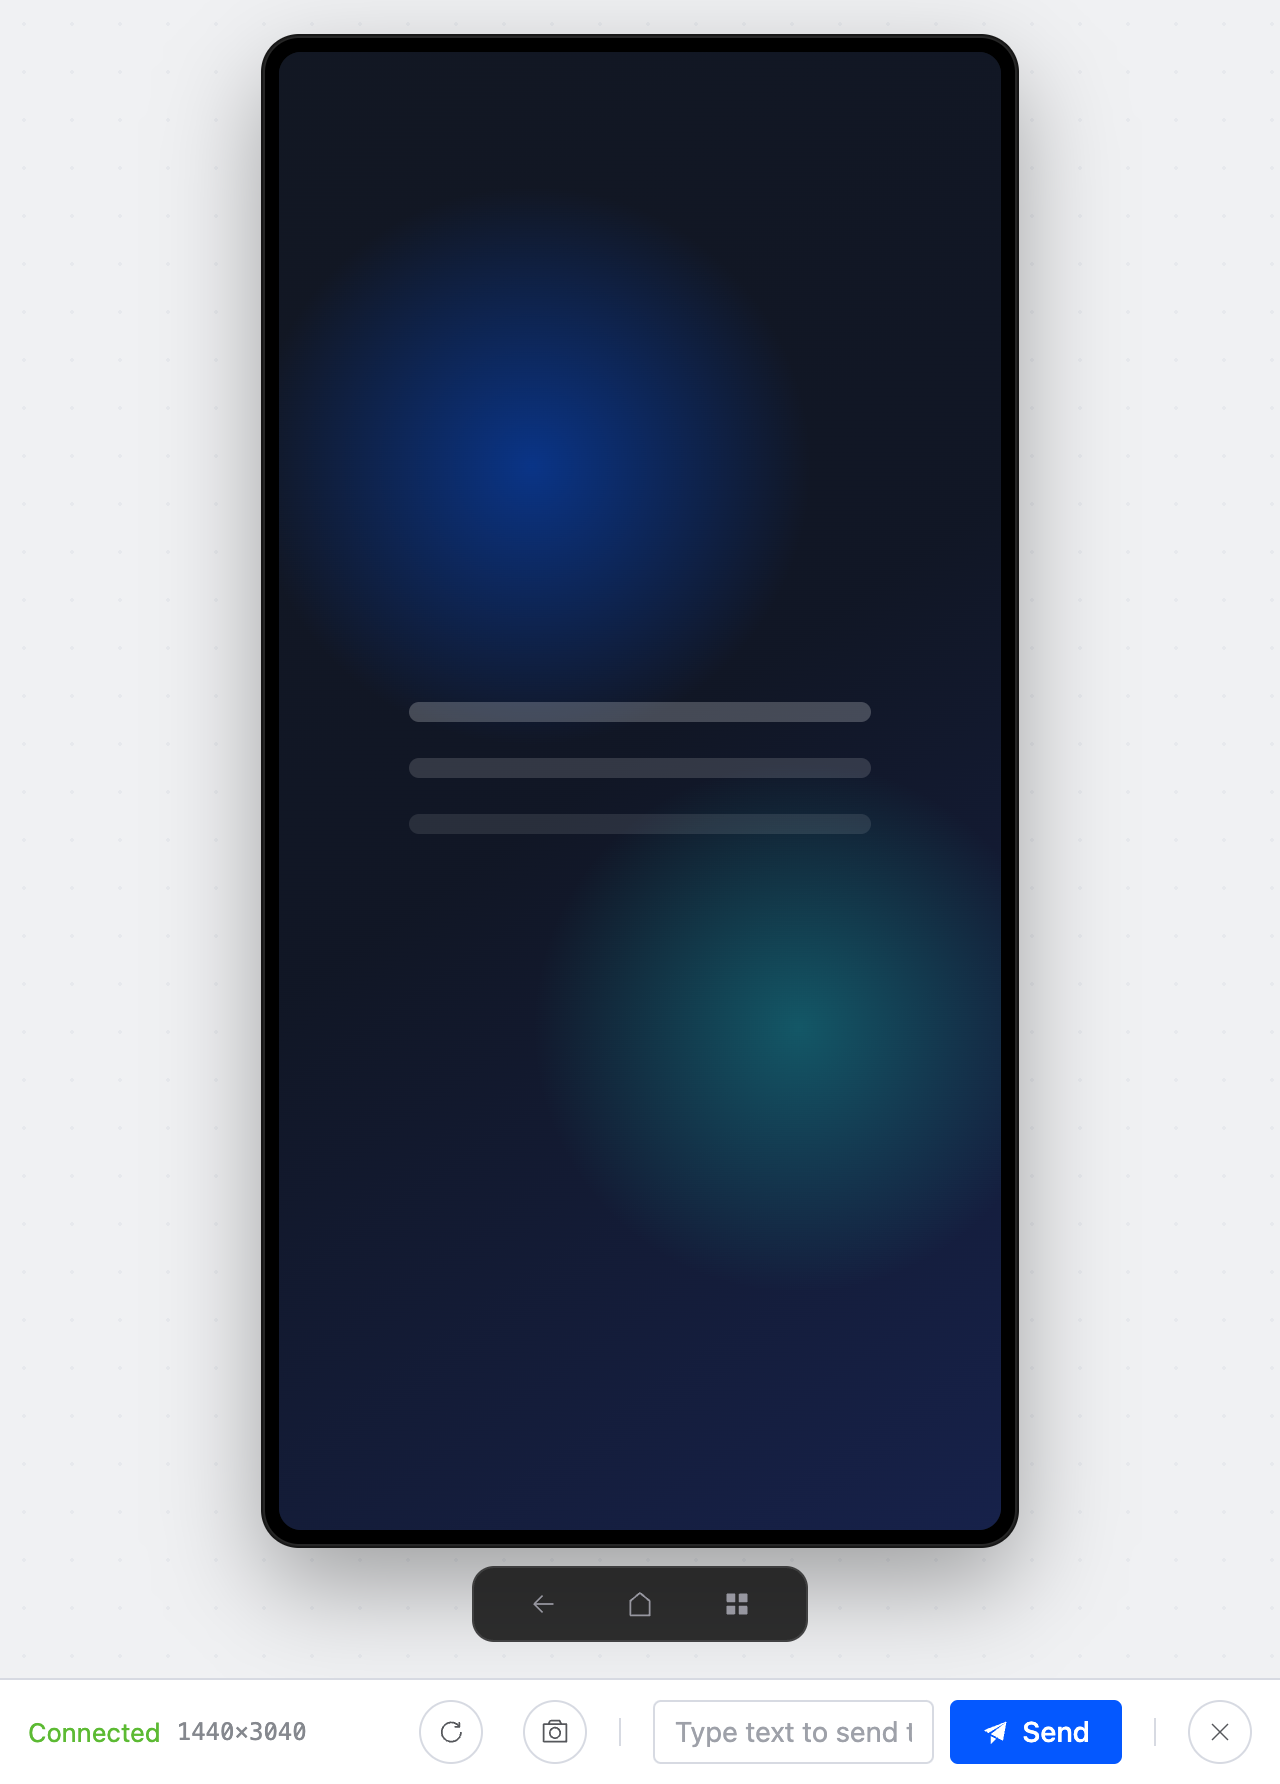
| Operation | Result |
|---|---|
| Mouse click | Tap the phone screen |
| Drag | Swipe or drag |
| Mouse wheel | Scroll inside the phone |
| Right click | Back |
| Middle click | Home |
| Keyboard input | Send text or key events to the focused phone input |
| Bottom Back/Home/Recents | Send Android navigation keys |
| Rotate | Rotate the device screen |
| Screenshot | Capture the current device screen |
| Text input box | Tap an input field on the phone first, then type and send from the desktop |
| Esc or close button | Close the control window without disconnecting the device wall |
If password pages, payment pages, or protected screens turn black, that is Android's secure-window protection, not a VMOS Cast failure.
Settings
Click the gear icon in the top bar.
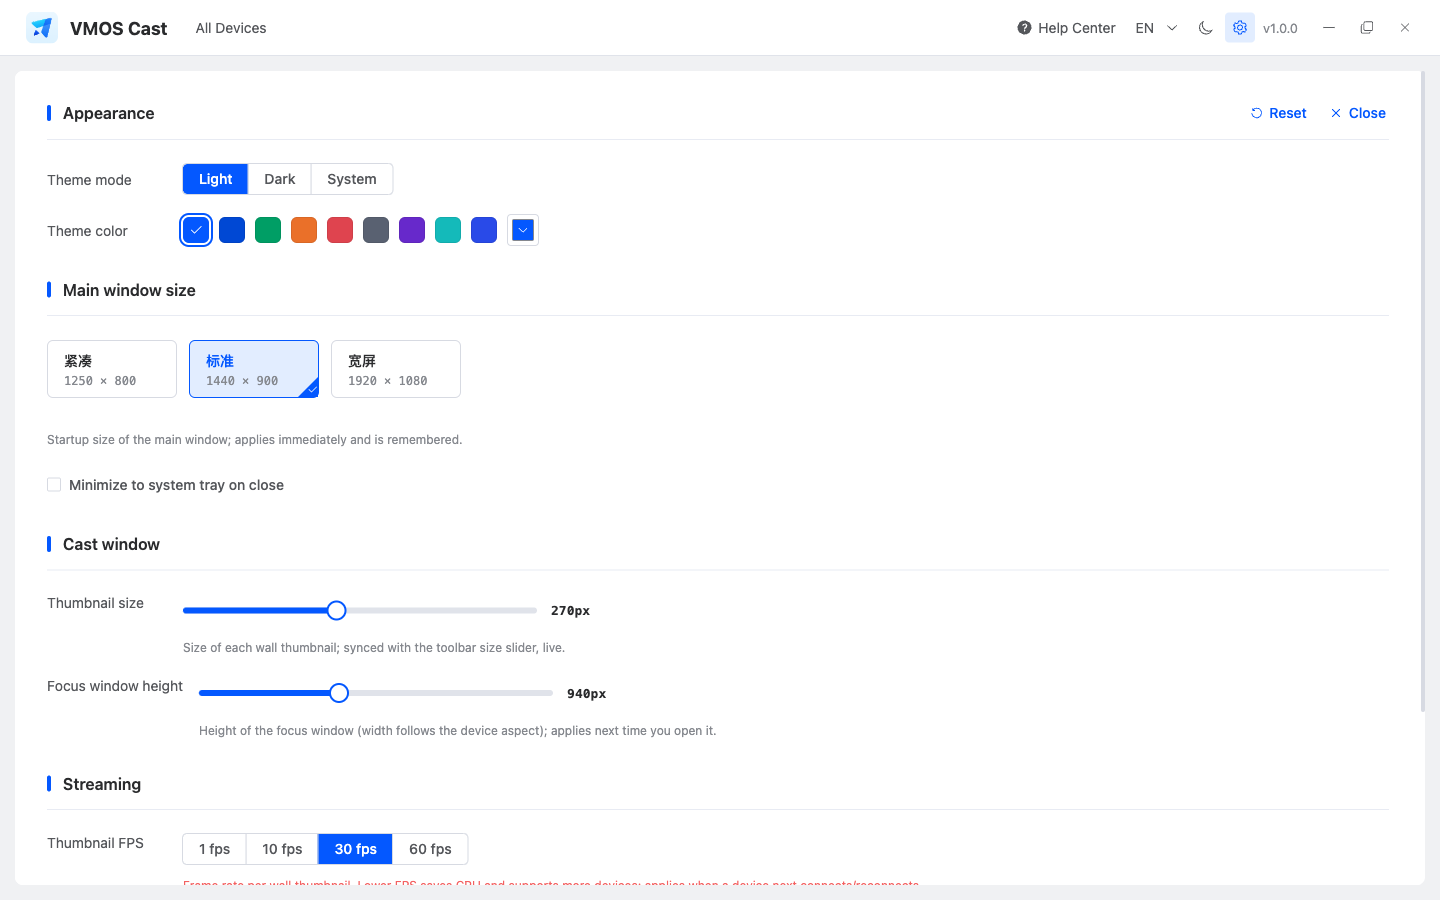
| Setting | Description |
|---|---|
| Theme mode | Light, dark, or system |
| Theme color | Choose a preset color or a custom one |
| Main window size | Compact, standard, or wide; VMOS Cast remembers the choice |
| Minimize to tray | Close the window without quitting the app |
| Thumbnail size | Same as the toolbar Size slider; changes device-wall cards immediately |
| Control window height | Sets the height for the next control window |
| Thumbnail frame rate | 1, 10, 30, or 60 fps; lower saves resources, higher is smoother |
| Export logs | Package logs into a zip for support |
| Check for updates | Manually check for new versions; download and restart to install when available |
| Restore defaults | Reset theme, window, thumbnail, and frame-rate settings |
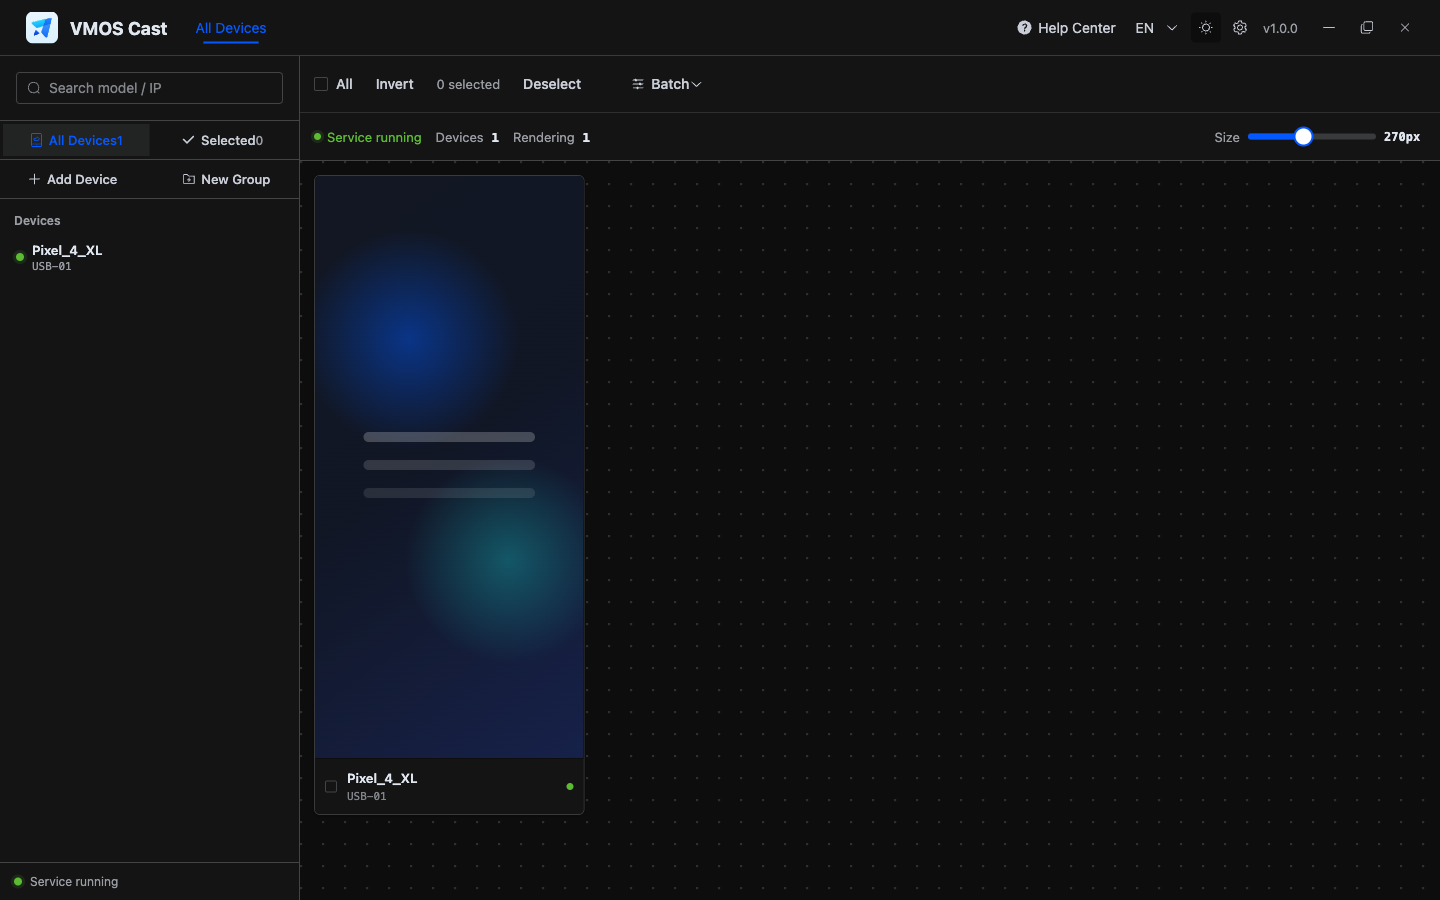
For long monitoring sessions, switch to dark mode:
Updates and Support
VMOS Cast silently checks for updates on startup and only prompts when a new version is available. You can also check manually from Settings.
When reporting a problem, first use Settings → Export logs, then follow How to report a problem with your computer OS, connection method, screenshots, or recordings.
Common Workflows
| Goal | Recommended path |
|---|---|
| Connect a physical phone for the first time | USB cable → allow USB debugging on the phone → device appears on the wall |
| Add many cloud phones | Add Device → paste addresses in bulk, or scan a subnet → select and add |
| Install one APK to a group | Create a group → open the group → select all → Batch → Install APK |
| Monitor devices for a long time | Filter by group → use smaller thumbnails → lower frame rate → dark mode |
| Work precisely on one device | Click the device screen → open control window → use mouse and keyboard |
| Report a problem | Settings → Export logs → send logs and screenshots to support |